Cobbles & Vines Book Sleeve Pattern | beginner crochet free pattern
The Cobbles & Vines Book Nook is a fun crochet pattern to create a cosy book nook!

Crochet Level:
(Adventurous) beginner
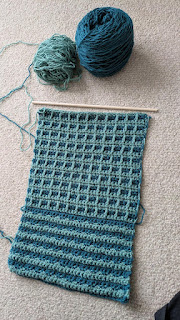
The final piece is 23 cm in width x 28 cm in length - considering only the crochet fabric.
The chain used to hang the nook is 20 cm (as length in between the dowel and the hook).
DK yarn. I used Prima 100% Super Soft DK Acrylic Yarn (100 g/290 m)
Colour A (blue in pics): 40 g
Colour B (sage green in pics): 35 g
210 m in total
Hook:
4.5mm crochet hook
Stitches and abbreviations used:
Chain: ch
Front Post Double crochet: fpdc (find a quick video here)
Right/Wrong Side: RS/WS
Single Crochet*: sc
Slip Stitch: slst
Stitch(es): st(s)
Turning chain: tc - does not count as a stitch
Yarn Over: yo
* Tip: For a sturdier make, crochet the single crochet with the yarn under instead of
insert the hook, yarn under, pull up a loop, pull through two loops.
This is how I crochet the single crochet stitches in the tutorials here.
Special techniques:
Front Post Double crochet:
yo and insert your hook behind the single crochet three rows below, yo (3 loops on the hook). Pull through two loops. Pull through two loops again (1 loop on the hook).
Colour change: Here the colour of yarn is changed every two rows at the end of the row. To change colour from colour A to colour B, or the other way around, for the last sc of the row, insert the hook as usual, but yarn over with the new colour. Tc in the new colour, and follow the next row as from instruction.
Gauge:
Full tutorial & Video tutorial for the gauge swatch
4.5 mm hook
10 cm x 10 cm = 15 sts x 4 set of squares (that is, 16 rows in pattern)
In Colour A (Note: blue in pics):
ch 15
Row 1: sc in the second ch from hook. sc in each ch. tc. [14]
In Colour B (Note: sage green in pics):
Row2: sc until the end of the row. tc. [14]
Row3: sc until the end of the row. tc. [14]
Note: the fpdc is placed in the only sc sts row in Colour A
With row 5, the first set of squares.
Pattern:
In Colour A (Note: blue in pics)
Ch 36
Row 1: sc in the second ch from hook. sc in each ch. tc. [35]
In Colour B (Note: sage green in pics):
Row 2: sc until the end of the row. tc. [35]
Row 3: sc until the end of the row. tc. [35]
In Colour A:
Row 4: *sc in the first two sts, fpdc in the next st - placed three rows below*.
Repeat until you have 2 sts left. Place a sc in each. tc. [35]
Row 5: sc until the end of the row. tc. [35]
Note: the fpdc is placed in the only sc sts row in Colour A
Repeat Row 2 to Row 5 for a total of 6 sets of squares
Now, we invert the pattern repetition to create the opposite colour combination.
Note: If you want to keep the colour combination uniform, repeat it in pattern for other 9 sets
In Colour B:
Row 6: sc until the end of the row. tc. [35]
In Colour A:
Row 7: sc until the end of the row. tc. [35]
Row 8: sc until the end of the row. tc. [35]
In Colour B:
Row 9: *sc in the first two sts, fpdc in the next st- placed three rows below*.
Repeat until you have 2 sts left. Place a sc in each. tc. [35]
Row 10: sc until the end of the row. tc. [35]
Repeat Row 7 to Row 10 for a total of 8 sets of squares in this colour-way –
14 sets of squares in total.
Repeat Row 7 to Row 9 – we skip the final sc row for the final set of squares.
Fasten Off.
Borders & Straps:
4.5 mm
Any Colour
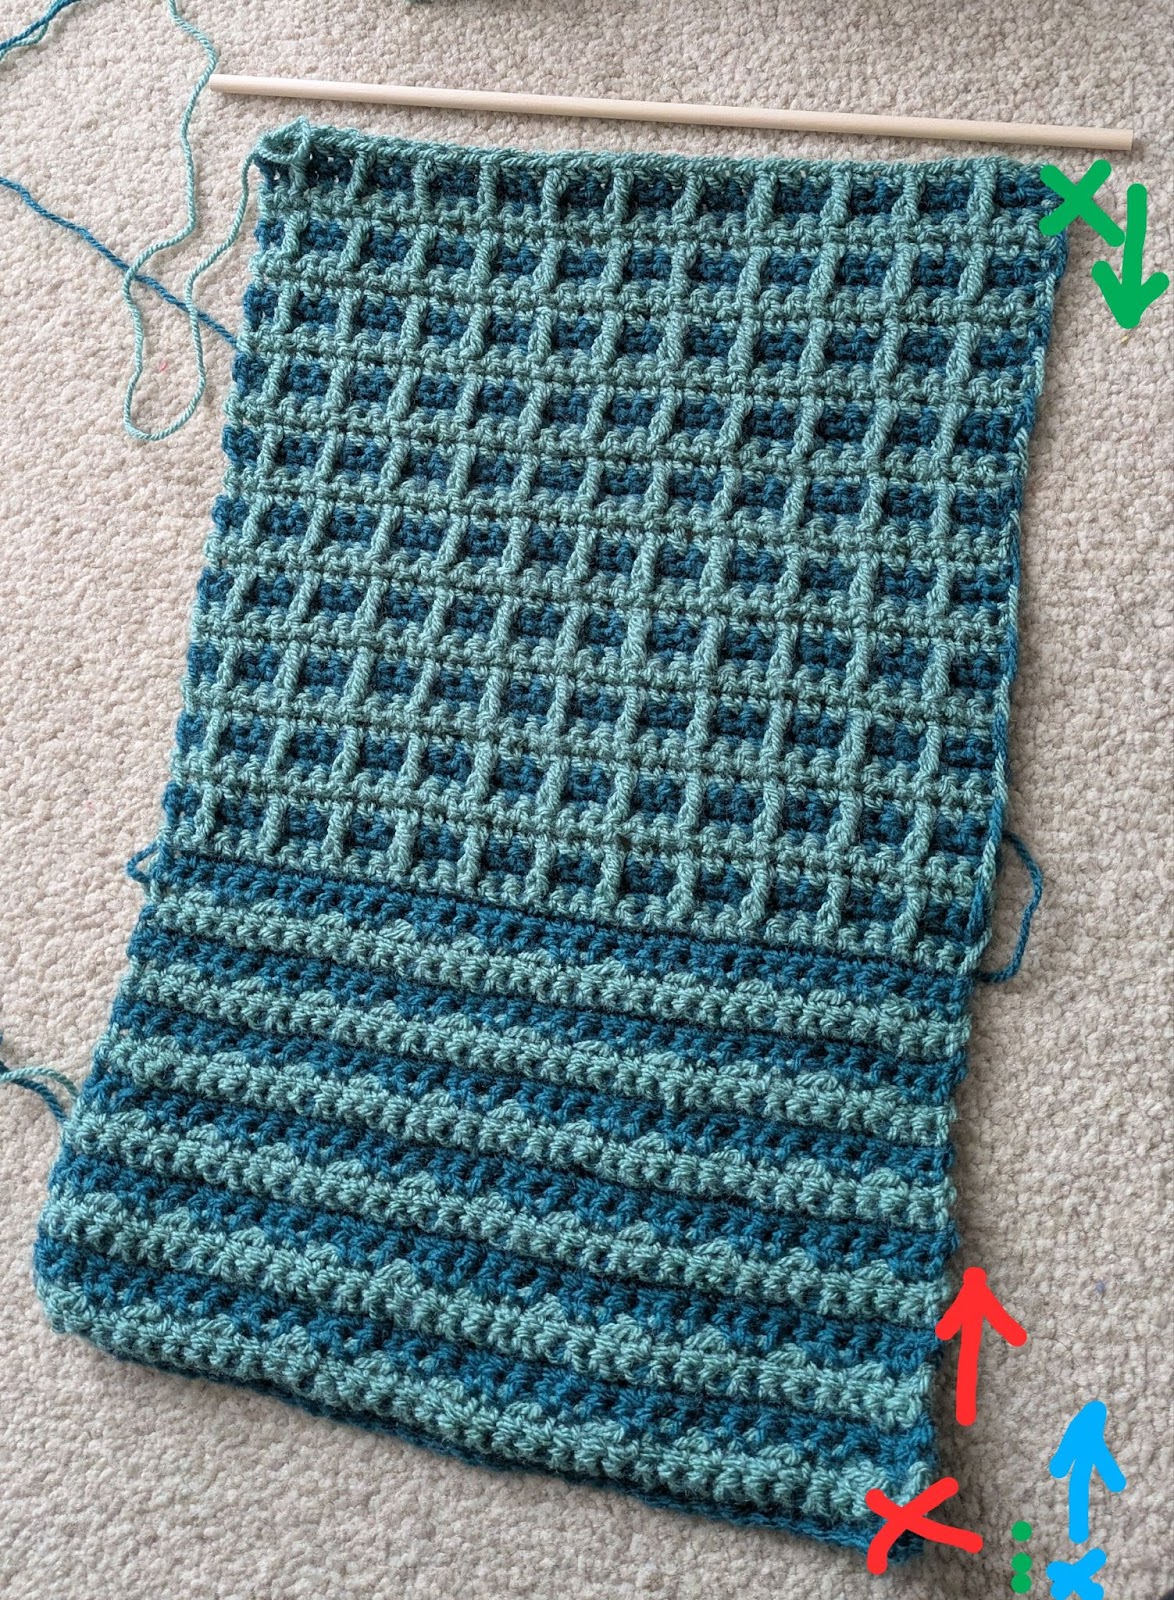
Once the body of the book nook is ready, face it so that the RS is visible at the top,
and the WS is visible at the bottom.
Attach the yarn at the bottom right corner (where there is the red cross in the figure),
sc from that corner to the upper right corner -
use your best judgement to place the sc sts at an equal distance from each other -
for reference, I placed 48 sts - until you reach the green cross in figure).
Do a tc and sc on top of the sts just placed. [48 sts]
At the end of the row, ch 31. Turn and sc in the second ch from hook. sc in each remaining ch.
Sc on top of the sts of the previous row [78]
Repeat the same steps for the other side, attaching the yarn in the bottom left corner.
Mount the dowel:
4.5 mm
Any Colour
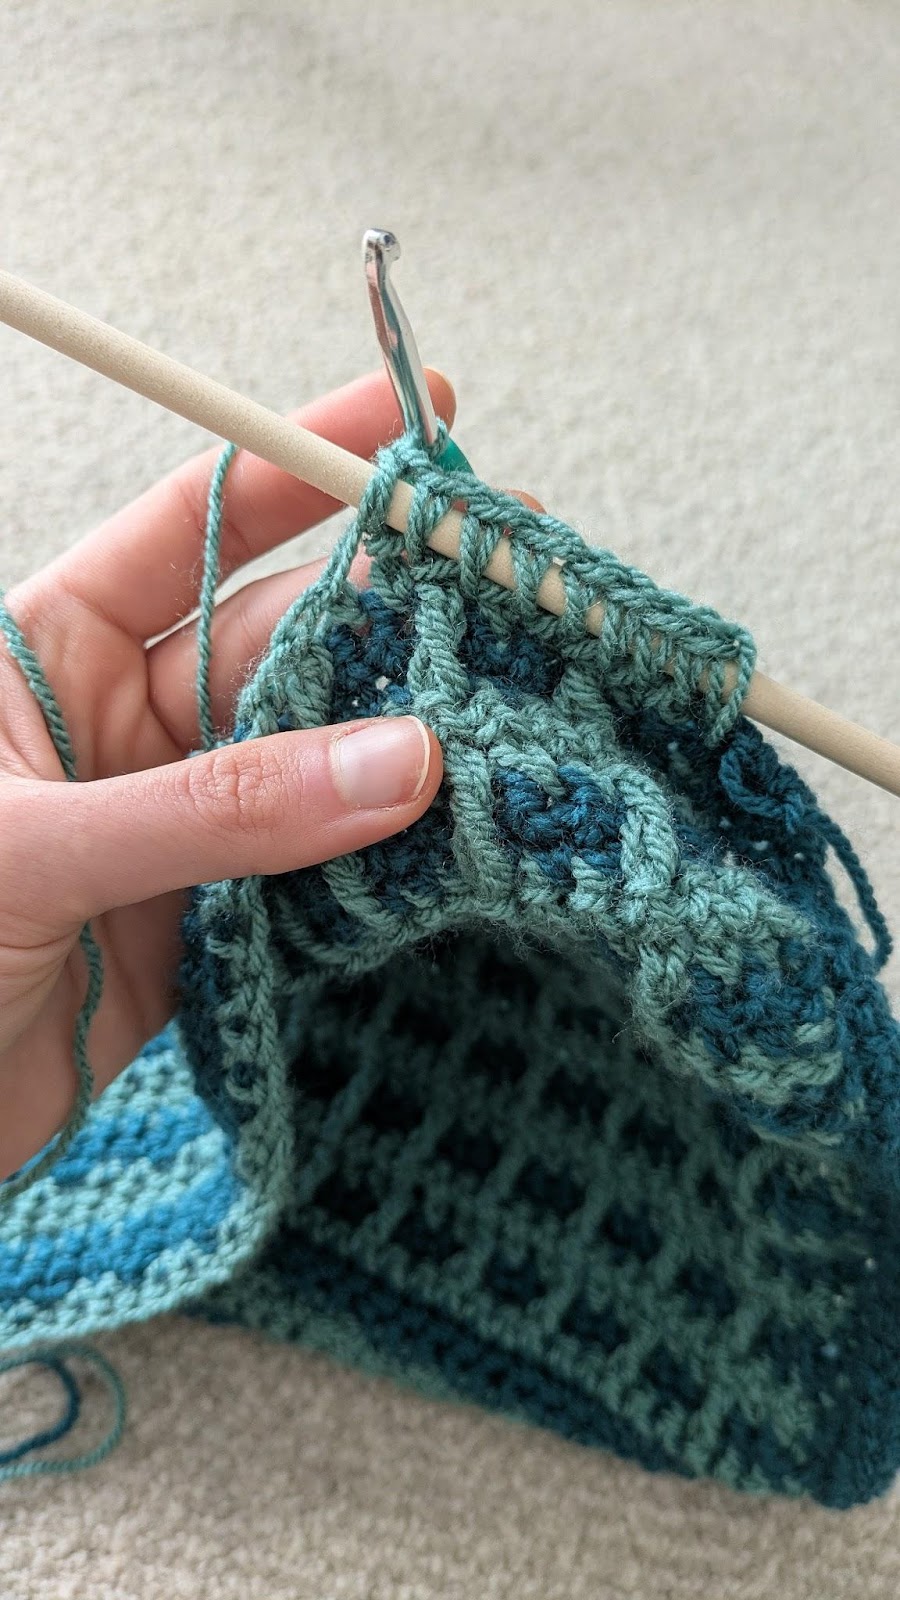
You now have the yarn in the top corner of the fabric.
Grab your dowel, check if the dimensions are correct.
Now, start using sc stitches to mount the dowel.
Place the dowel between the fabric and the yarn you are using.
For every stitch at the top of the fabric, place a sc stitch in the following way:
Insert the hook in the stitch, yarn over from behind the dowel, pull through the loops
- the sc st is on top of the dowel. Repeat till the end.
Don’t fasten off. We now chain to create the cord
Cord:
4.5 mm
Any Colour
Note: to decide how long to do the chain that acts like a cord to hang the book nook,
I recommend checking where you want to place it and how much lower than the hook
you want the nook to fall.
I chained 51 ch, giving me a distance of 20 cm between the hook/nail and the book nook.
Ch 51, slst in the first st at the opposite side of the dowel. Fasten off.
To add strength to the attachment, just add a few stitches using a threading needle.
Weave in your ends, and enjoy your Cobbles & Vines Book Nook!
Show me your amazing creation, tagging me on instagram at @o_layarn
or emailing me at lolla.olayarn@gmail.com
If you enjoyed crocheting this book sleeve, check out the other patterns
that are in my shop and follow me on instagram at @o_layarn to keep
updated with my new patterns!